Author: swdpankaj

  • How to show Icon in Text widget in flutter

    How to show Icon in Text widget in flutter

    To add an icon alongside text in Flutter, you should not directly embed an Icon widget inside a Text widget. Instead, you should use a layout widget like Row, Wrap or Text.rich to place them inside text button.

    Solution from google search.

    Using Wrap:
    Wrap(
      crossAxisAlignment: WrapCrossAlignment.center,
      children: [
        Text('Click'),
        Icon(Icons.add),
        Text('to add'),
      ],
    )
    Using Row:
    Row(
      mainAxisSize: MainAxisSize.min,
      children: [
        Text('Click'),
        Icon(Icons.add),
        Text('to add'),
      ],
    )
    Using Text.rich:
    Text.rich(
      TextSpan(
        children: [
          TextSpan(text: 'Click'),
          WidgetSpan(child: Icon(Icons.add)),
          TextSpan(text: 'to add'),
        ],
      ),
    )


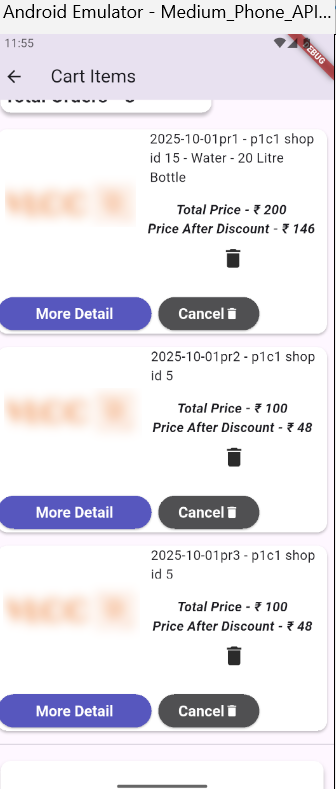
    Here is my own code solution – placed icon with button with text.

    SizedBox(width:8,),
             
              // button2
    SizedBox(
               // padding: const EdgeInsets.symmetric(vertical: 16),
                
    
                child: ElevatedButton(
    
                  style: ElevatedButton.styleFrom(
                    backgroundColor: const Color.fromARGB(255, 81, 81, 82),
                  //minimumSize: const Size(double.infinity, 250), 
                    foregroundColor: Colors.white,
                    //padding: EdgeInsets.symmetric(horizontal: 50, vertical: 20),
                    textStyle: TextStyle(
                    fontSize: 18,
                    
                    fontWeight: FontWeight.bold)),


              onPressed: () {
               /* Navigator.push(
                  context,
                  MaterialPageRoute(builder: (context) => const MyApp_register()),
                );*/
              },
    
                 
                  child:  Wrap(
      crossAxisAlignment: WrapCrossAlignment.center,
      children: [
        Text('Cancel'),
        Icon(Icons.delete),
     
      ],
    ),
    
                  
                ),
              ),
  • Display MySQL date with short name using query

    To display a MySQL date with a short month name, such as “Jan” for January, we have to use the DATE_FORMAT() function with the %b format specifier.

    Here is an example using SQL Query:

    Code

    SELECT DATE_FORMAT('2025-10-10', '%d-%b-%Y');
    

    This SQL query will return the date in the format “10-Oct-2025”.

    We can also include other short names, such as the abbreviated weekday name, using the %a specifier:

    SQL Code

    SELECT DATE_FORMAT('2025-10-10', '%a, %d %b %Y');
    

    This query would return “Fri, 10 Oct 2025”.

  • Get textfield value if textfield exist using jquery

    Get textfield value if textfield exist using jquery

    Check if element exists in jQuery

    Solution Over Google

    Try to check the length of the selector, if it returns you something then the element must exists else not.

     if( $('#selector').length )         // use this if you are using id to check
    {
         // it exists
    }
    
    
     if( $('.selector').length )         // use this if you are using class to check
    {
         // it exists
    }

    My Solution

    <html>
    <head>
     <script src="https://ajax.googleapis.com/ajax/libs/jquery/3.6.1/jquery.min.js"></script>
    </head>
    <body>
    <form  method="post">
    <input type="text" name="myTextField" id="myTextField" />
    <input type="text" name="myTextField1" id="myTextField1" />
    <input type="text" name="myTextField2" id="myTextField2" />
    <input type="text" name="myTextField3" id="myTextField3" />
    <input type="button" name="b1" id="b1" value="Click" class="button" />
    </form>
    <script src="http://ajax.googleapis.com/ajax/libs/jquery/1.7.1/jquery.min.js" type="text/javascript"></script>
    <script language="javascript">
      $('#b1').click(() => {
      
      if( $('#myTextField4').length )         // use this if you are using id to check
    {
          alert('sadasdsa');
    }
    else
    {
    	alert('this text field not found');
    }
             
    
    });
    </script>
    </body>
    </html>
  • Copy one field data to another field using MySQL query

    Copy one field data to another field using MySQL query

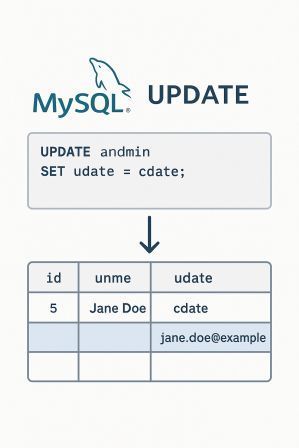
    To copy data from one field (column) to another field within the same table in MySQL, you use the UPDATE statement.

    Syntax Code:

    UPDATE SET = WHERE Condition;

    Explanation of the above syntax:

    Table_Name: Replace this with the actual name of your table.

    Target_Column: Replace this with the name of the column where you want to copy the data to.

    Source_Column: Replace this with the name of the column from which you want to copy the data from.

    WHERE Condition (Optional): This clause specifies which rows should be updated. If you omit the WHERE clause, the data from Source_Column will be copied to Target_Column for all rows in the table. Use a WHERE clause to target specific rows based on a condition.

    Example:

    Suppose you have a table named admin with columns cdate and udate. You want to copy the values from cdate into udate for all admin rows.

    The code is below.

    UPDATE admin SET udate = cdate;

    with where clause

    UPDATE admin SET udate = cdate WHERE cdate !=”;

    Important Considerations:

    Data Types: Ensure that the data types of the Source_Column and Target_Column are compatible. MySQL will attempt to convert data types if they are different, but this can lead to errors or data loss if the conversion is not possible or results in truncation.

    Backup: Before performing any UPDATE operation on a live database, it is highly recommended to create a backup of your data.

    WHERE Clause: Be very careful with your WHERE clause. A mistake here can lead to unintended data changes across your entire table.

  • Warning: ZipArchive::close(): Failure to create temporary file: Permission denied in

    Warning: ZipArchive::close(): Failure to create temporary file: Permission denied in

    Warning: ZipArchive::close(): Failure to create temporary file: Permission denied in

    Fatal error: Uncaught PHPExcel_Writer_Exception: Could not close zip file

    The most common cause of this error when saving to php://output is an open_basedir restriction that doesn’t include a valid system’s temp folder (e.g. /tmp), or permissions for the system’s temp folder…  can also affect this, even when the obvious permissions appear to be set correctly.

    A possible workround is to write the file to the filesystem in a directory that you know you do have full privileges to write, and then use readfile() to stream that file to php://output before deleting the file

  • How To Configure Gmail Send Cancellation Period – Undo Send

    How To Configure Gmail Send Cancellation Period – Undo Send

    Some times when we send any mail, but due to wrong recipient, subject or  message body content,  we want to cancel that email at the time of sending period.

    Gmail’s “Undo Send” features allows us to cancel the email within maximum 30 seconds. It means, We can recall an email with gmail’s “Undo Send” features.

    With this setttings users can ‘unsend’ an email after tapping send button in 5 seconds, 10 seconds, 20 seconds, or 30 seconds before it gets to the recipient. 

    This functionality is available on the Gmail for Web and the Gmail mobile app  to recall a mistakenly sent message.